Archive for the ‘TEChNoLoGY’ Category

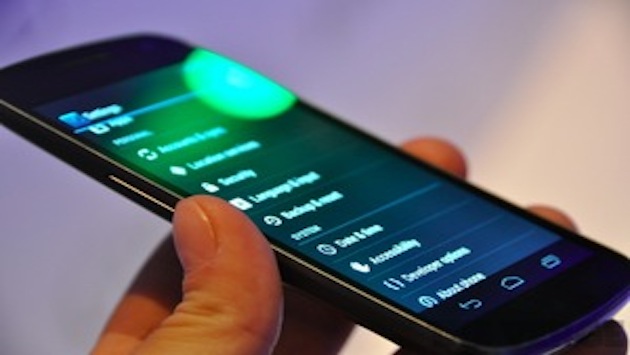
How to take a screenshot on your Samsung Galaxy Nexus

November 6th, 2012, posted in Android
Share

Galaxy Nexus

Sharing screenshots is pretty fun, especially when you receive a fun message or see something hilarious on your smartphone. Screenshots can also be pretty useful, especially on a device like the Galaxy Nexus.

What’s that ??
You don’t know how to take a screenshot ??
No problem !!
Our quick guide below will have you snapping screening in no time. It’s darn easy.

Anyway, to start taking screenshots on the Galaxy Nexus, just follow these easy steps:

  1. Wake your Samsung Galaxy Nexus
  2. Hold down the Power button and then press the Volume Down rocker (hold the buttons for two seconds)
  3. OK, you’re done. You’ll see a message appear on the screen that says “screenshot saved to camera shots.” Your screenshot will then be available in the Android Gallery app on your app drawer

Now head on out and start snapping some awesome screenshots to share.

Share

How to Enable Telnet Client in Windows 7

October 14th, 2012, posted in Microsoft
Share

Telnet Client is used to connect to remote machine by using the Telnet protocol. For example, I’m an old fashion IT guy, and I still like to configure Cisco Switches/Routers using telnet. If you started to use Windows 7, you will notice that telnet is not enabled by default !! Don’t panic, it is just a matter of few clicks and telnet will be enabled again.

Telnet Client allows a computer to connect to a remote Telnet server and run applications on that server. Once logged on, a user is given a command prompt that can be used as if it had been opened locally on the Telnet server’s console. Commands that you type at the Telnet client command prompt are sent to the Telnet Server and executed there, as though you were locally logged on to a command prompt session at the server. Output from the commands that you run are sent back to the Telnet client where they are displayed for you to view.

When you first try to run a telnet command, Windows will informs you that telnet is not recognized as a command

telnet not enabled

To enable Telnet Client on Windows 7, follow these steps :

  1. Click on Start start button,windows7 then right click on Control Panel
    control panel,windows 7,telnet
  2. From Control Panel, click on Programs :
    programs,telnet,windows 7
  3. Under Programs and Features, click on Turn Windows Features on or off
    windows features,windwos7,telnet,Under Programs and Features, click on Turn Windows Features on or off
  4. From the Windows Features window, using the slider, scroll down till you reach Telnet Client, select the check-box beside it, then click on OK
    select telnet client,telnet,windows 7,From the Windows Features window, using the slider, scroll down till you reach Telnet Client, select the checkbox beside it, then click on OK

    The selected feature will be installed.
    install feature,windows7,microsoft
  5. To confirm that Telnet is installed, open command prompt and type telnet /?telnet enabled

Summary

By default, Telnet Client is not enabled in Windows 7. To enable it, you have to add the Telnet Client Windows Feature.


Another Method :

  • Open a command prompt window.
  • Click Start,type cmd in start search box, and then press Enter.
  • Type the following command

pkgmgr /iu:”TelnetClient

  • If the User Account Control(UAC) dialog box appears, confirm that the action it displays is want you want, and then click continue.
  • When the command prompt appears again, the installation is complete
[ This article is posted at http://social.technet.microsoft.com website : http://social.technet.microsoft.com/wiki/contents/articles/910.how to-enable-telnet-client-in-windows-7.aspx ]
Share

MMS Setting For Ufone, Warid, Telenor

July 16th, 2012, posted in MOBiLE, PAKiSTAN
Share

***************************************************************

Ufone MMS Settings

***************************************************************

ufone

To be able to use Ufone MMS you need to have MMS enabled on your number and a compatible handset.

You can get MMS & GPRS settings for your handset by:

– Sending your phone’s model number in an SMS to 222, Example: P910i or 6600 or razr v3

– By Ufone Help Line or by visiting the nearest Customer Services Center.

MMS Charges:

The cost of sending a local MMS to any network or an email address is Rs. 5.00 + Tax per 64KB

Uth MMS is charged at Rs. 1 + Tax per 64KB

Incoming MMS is absolutely free.

How to Subscribe:

To subscribe to Daily MMS Package simply send SMS with keyword SUB to 665

PACKAGES SUBSCRIPTION NO. OF FREE MMS VALIDITY SMS ‘SUB’ TO
Daily MMS Package Rs. 3.99 + tax 150 24 Hours 665

For ufone details check this link :

http://www.ufone.com/mobpro_mobileinternet.aspx

***************************************************************

Telenor MMS Settings

***************************************************************telenor MMS

Send a text message to 131 with your handset make and model to receive your handset settings:

For Example:

For Internet

  • Write “Internet” and SMS it to 131

For WAP

  • Write “wap” and SMS it to 131.

For MMS

  • Write “mms” and SMS it to 131.

For All handset setting

  • Write “All” and SMS it to 131.

For more telenor mms details visit this website :
http://www.telenor.com.pk/telenor-handset-settings

***************************************************************

Warid MMS Settings

***************************************************************

MMS (Multimedia Messaging Service)warid MMS

With MMS, messaging is fun, colorful and musical. Add pictures, animations, polyphonic & true tones, and even video clips to messages, and show the world how amazing communication can be.

How it works?

Please consult your mobile phone instruction manual to see exactly how this is done on your particular phone.

Next, you need to configure your handset with Warid MMS settings. Please follow these simple steps to get the MMS configuration:

Method 1

Go to: Warid>Messaging>Multimedia Settings>MMS

Enter handset make (e.g. nokia) & model number (e.g. 6020) when prompted.

  • SMS is generated from your handset
  • You will receive a message with the settings. Please select ‘yes’ to save the settingsNote: Before using MMS, please ensure to subscribe to the GPRS service and have your handset configured

Method 2

Type ‘SET MMS’ & Send to 1190

You will receive the MMS settings via a message.

Please select ‘yes’ to save the settings

Note: There are certain mobiles that do not support this setting process. Please contact our Customer Service Center for assistance.;

Mobile Internet

This powerful service offers you complete flexibility to view the internet on your cell phone or laptop. So whenever you are on the move and want to look for information on the internet, simply setup the internet connection from your GPRS/ WAP/EDGE enabled handset. You can also use your handset as a GPRS modem and connect it to your laptop wirelessly using Bluetooth, infrared or a cable.

How it works?

Consult your handset instructions manual to find out if your handset supports GPRS/ WAP/EDGE. Alternately call our Customer Care Center on 321 from your Warid phone or simply dial our UAN 111-111-321 from any other phone.Please also ensure, you have subscribed to GPRS before configuring these settings.

  • Go to: Warid Menu>Messaging>Mutimedia Settings>WAP/GPRS
  • Enter the handset make (e.g nokia) and model number( e.g 6020) when prompted.
  • SMS will be generated from your handset
  • You will receive a message with the settings. Please select ‘yes’ to save the settings in your handset

Note: Before using mobile internet, please subscribe to the GPRS service and have your handset configured.

For more detail for Warid MMS , visit this website :
http://www.waridtel.com/products/mobile_wizard/index.php

*********************************************************************************************************************************************************
Note : We am just providing you the detials … Please confirm it yourself as well… We are not responsible for anything..
*********************************************************************************************************************************************************

Share

About HP Pavilion g6-1144sx Notebook PC

July 10th, 2012, posted in TEChNoLoGY
Share

Specifications :

Product Name

g6-1144sx
Product Number QA864EA
Microprocessor 2.3 Ghz Intel Core i5-2410M
Microprocessor Cache 3 MB L3 cache
Memory 4 GB DDR3
Memory Max Upgradeable to 4 GB DDR3
Video Graphics Intel HD (up to 1.66 GB)
Display 39,6 cm (15,6″) High-Definition LED HP BrightView Display (1366 x 768)
Hard Drive 640 GB SATA (5400 rpm)
Multimedia Drive SuperMulti DVD±R/RW with Double Layer Support
Network Card Integrated 10/100 BASE-T Ethernet LAN
Wireless Connectivity Bluetooth wireless networking

802.11 b/g/n

Sound Altec Lansing speakers
Keyboard Full size keyboard with home roll keys
Pointing Device TouchPad supporting Multi-Touch gestures and On/Off button
PC Card Slots Multi-Format Digital Media Card Reader for Secure Digital cards, Multimedia cards
External Ports
  • 1 VGA
  • 1 headphone-out
  • 1 microphone-in
  • 3 USB 2.0
  • 1 RJ45
Dimensions 37.4 x 24.5 x 3.63 cm
Weight Starting at 2.55 kg
Power 65W AC Power Adapter

6-cell Lithium-Ion (Li-Ion) battery

What’s In The Box Webcam with Integrated Digital Microphone (VGA)
Share

Pakistan Military Introduces Takhti, An Android Tablet (PAC)

July 9th, 2012, posted in PAKiSTAN, TEChNoLoGY
Share

An Android Tablet (PAC)

It appears that Pakistan Aeronautical Complex Kamra (PAC), a unit of Pakistan military, is getting serious with tablet manufacturing business.

After introducing PAC Pad1, PAC eBook1 and PAC nbook 1 PAC is now offering Takhti 7, an android tabled-computer.

Pakistan Aeronautical Complex (PAC) said that it has partnered with INNAVTEK International to produce Takhti 7, a better form of PAC Pad1.

Takhti 7 is said to be a sister tablet of PAC Pad1, having enhanced hardware such as double RAM and better ARM Cortex-A8 processor packed with-in it.

Takhti 7 boosts a 7 inch capacitative screen and improved battery time as well.

The Takhti 7 uses Android Ice Cream Sandwich instead of Android Gingerbread used by the PAC Pad1.

Specifications for Takhti 7

  • Processor: 1 GHz Cortex-A8
  • Operating System: Android OS 4.0
  • Memory: 512 MB RAM
  • Micro SD Card: Up to 32 GB
  • Display: 7″ inch
  • Connectivity: Wi-Fi: 802.11 b/g
  • USB: Mini USB 2.0
  • HDMI: HDMI support available
  • Content Formats Supported MP3, WMA, AAC, 3GP, WAV, JPG, BMP, PNG, GIF, AVI, MKV, WMV, MOV, MP4, MPEG, MPG, FLV
  • Miscellaneous G-sensor, 3.5mm Earphone Jack
  • Software & Games: Word, Excel, PowerPoint
  • Supported Audio Formats: MP3, WMA, AAC, WAV
  • Supported video Formats: AVI, MKV, WMV, MOV, MP4, MPEG, MPG, FLV
  • Supported Image Formats: JPG, BMP, PNG, GIF highest support 4096 x4096
  • Other Supported Formats: PDF, TXT
  • Supports online games, online video streaming

Price:

PAC said that Takhti 7 is priced at Rs. 15,500.

Availability:

Like before, PAC is still struggling with its sales network. Takhti 7 is currently available at their Rawalpindi Office, meaning that residents of other cities will either have to travel to Rawalpindi or they can wait until PAC reaches out to their cities for making Takhti 7 available there.

For orders, you can call these numbers: +92 (51) 5153 958, +92 (51) 8430643, +92 (51) 8430644

Outlet Address: House # 804, Street 1, Chaklala Scheme 3, Rawalpindi.

Share